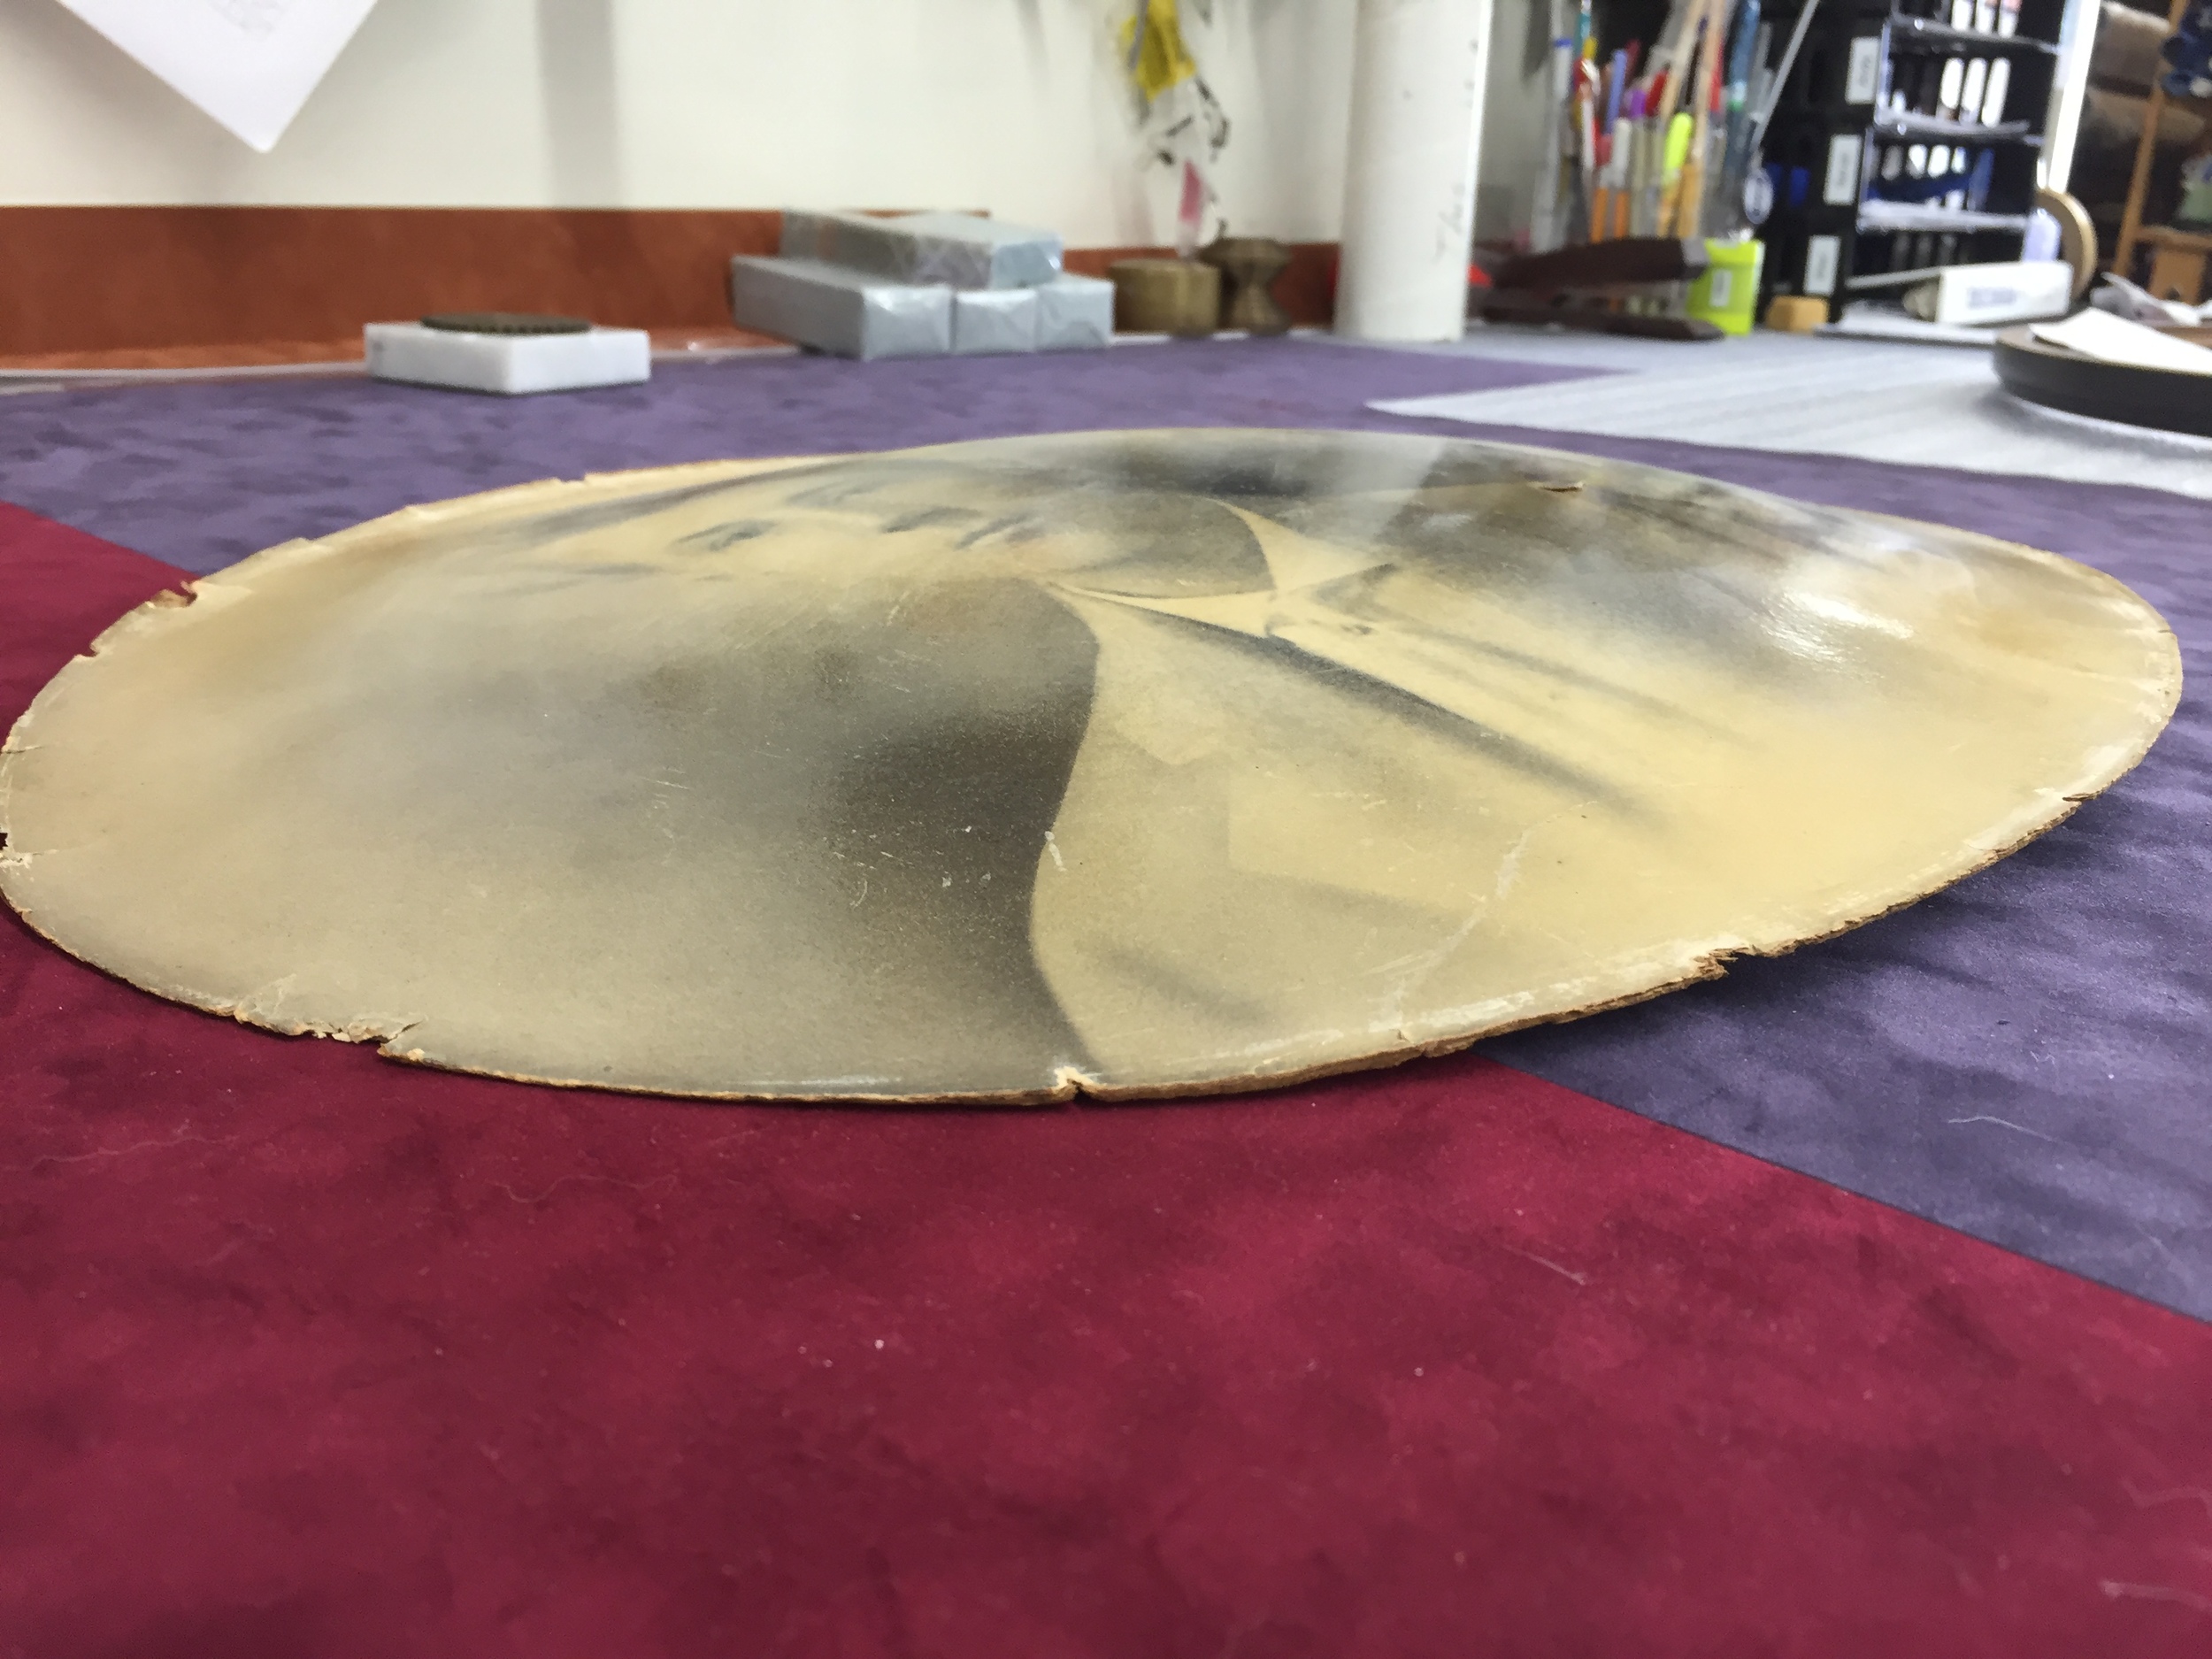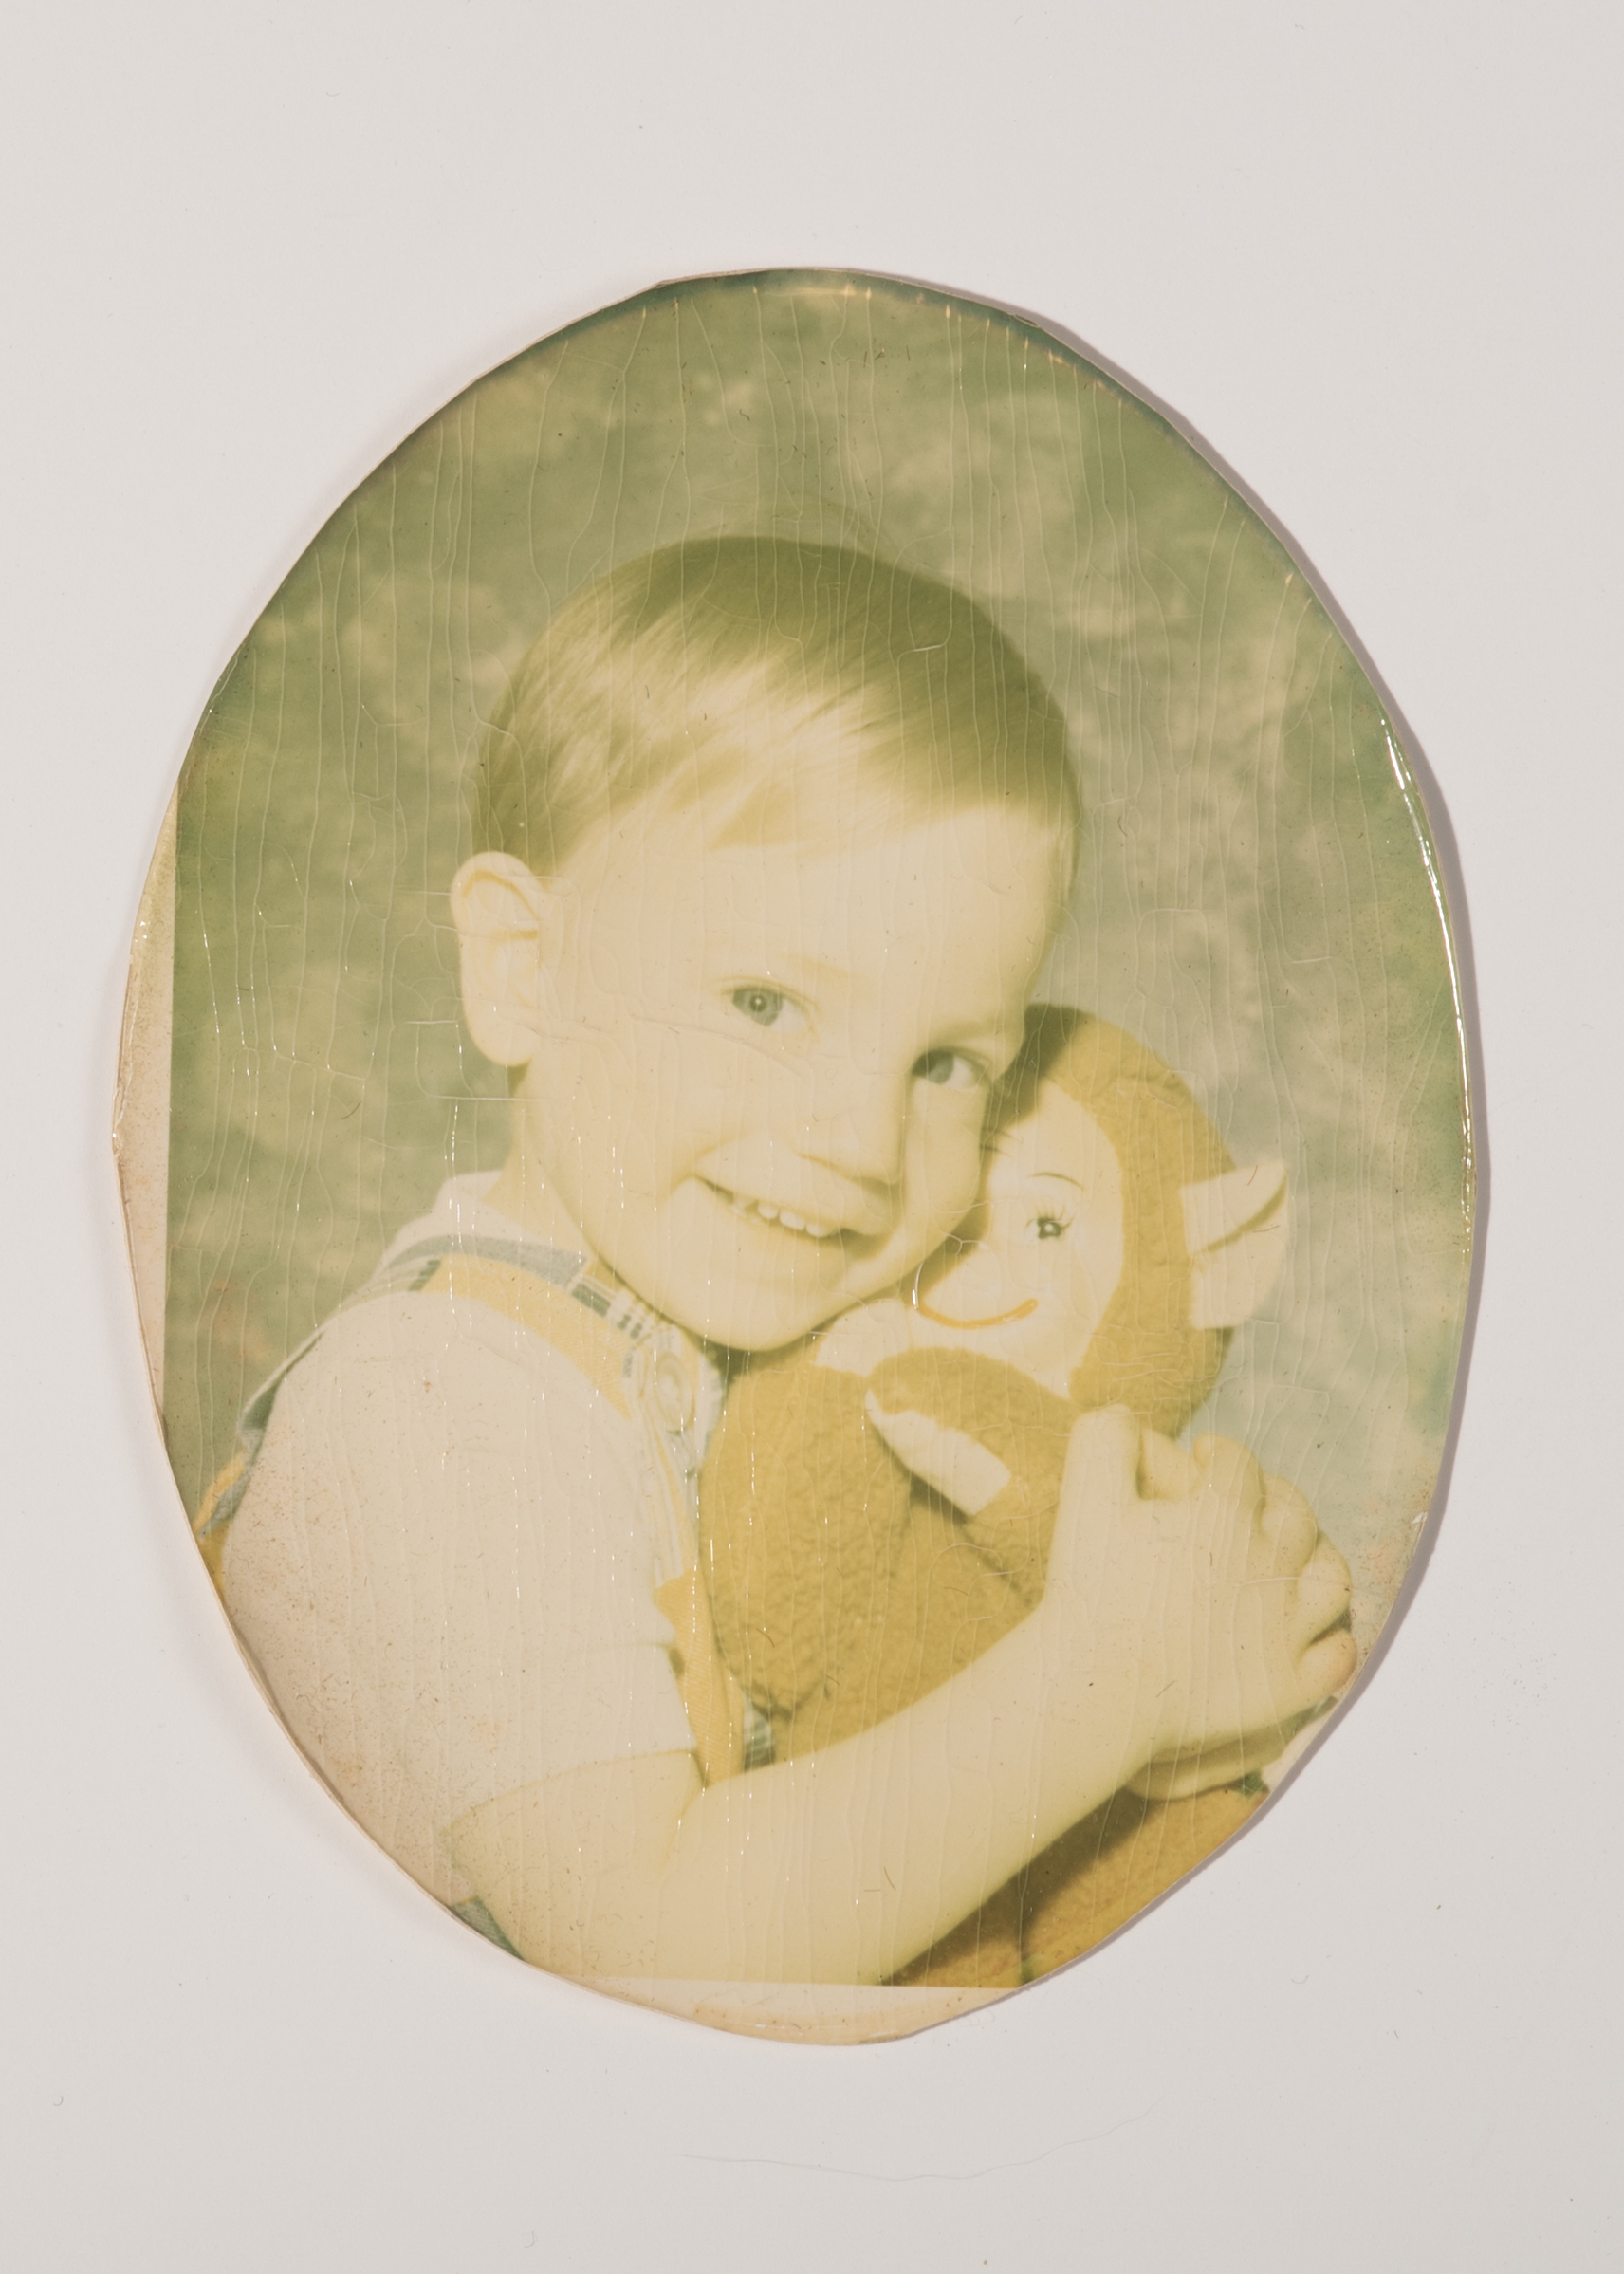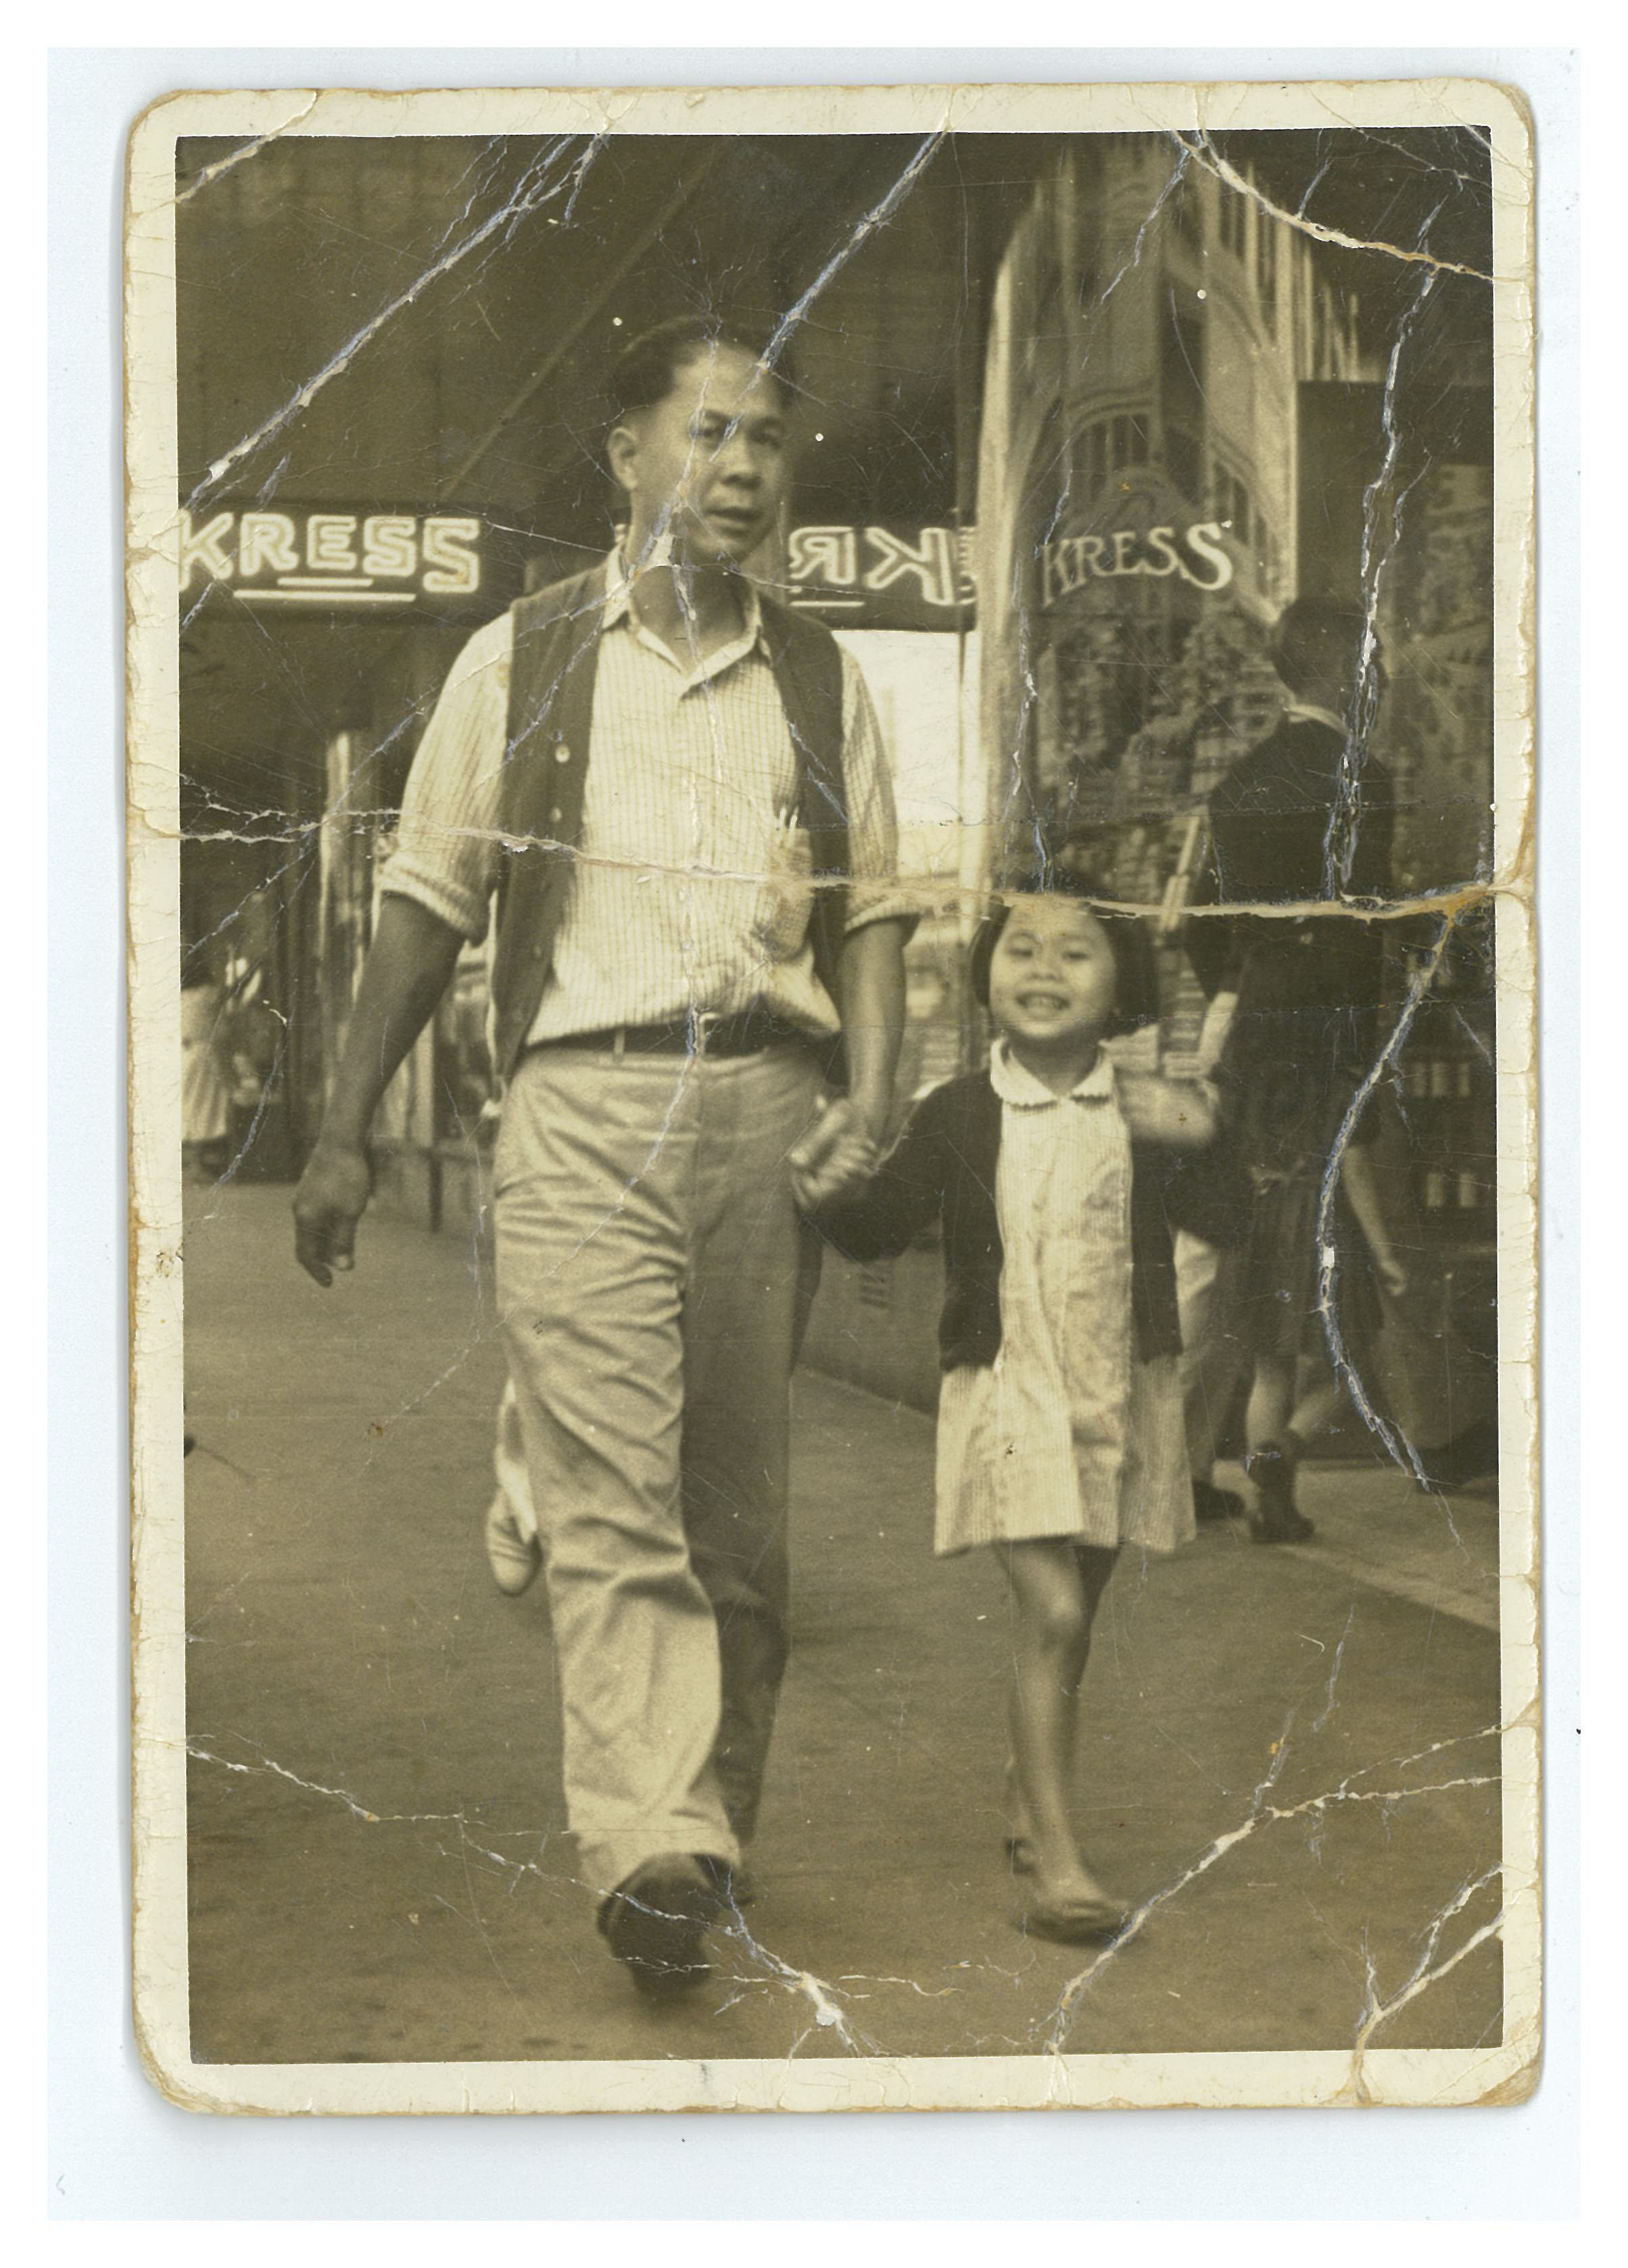
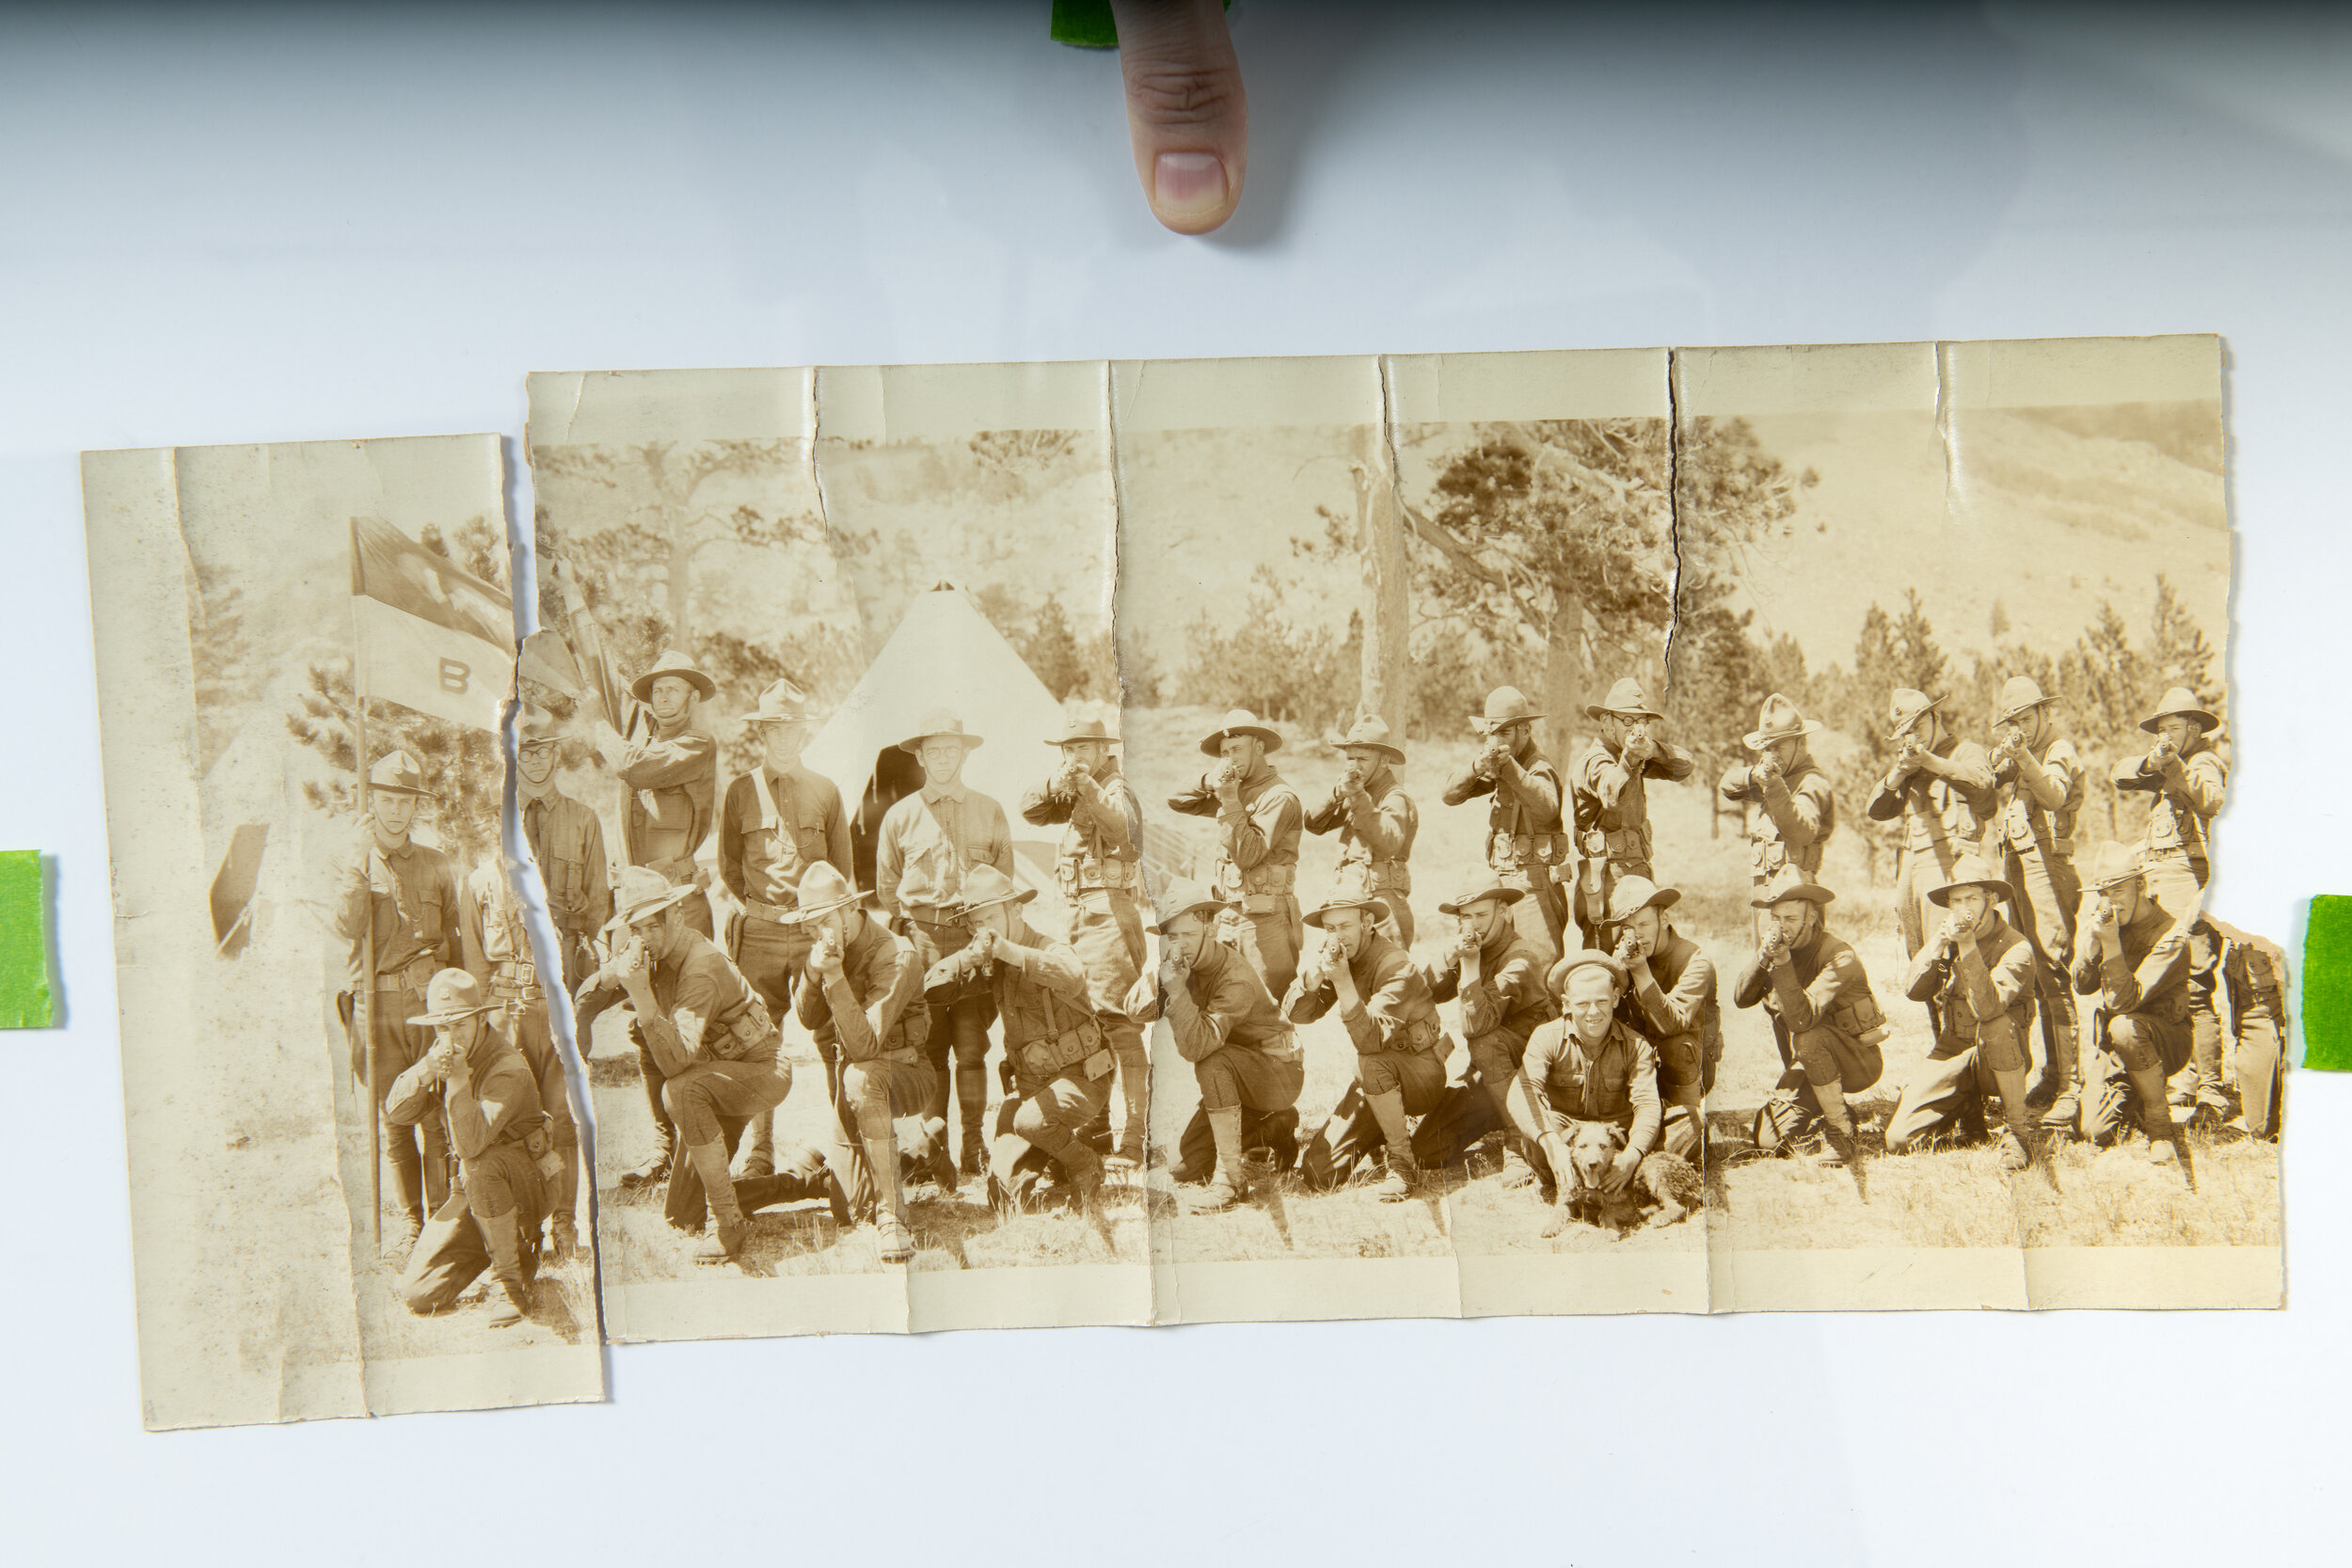
There are times I receive photos to restore that make me a little nervous. I’m experienced at carefully handling old photographs as I’ve been doing preservation quality picture framing for over 14 years. Certain images, though, present quite a challenge. For instance, the image below came to me rolled so tightly that you had to have more than two hands to hold the image down once unrolled. Also, as it unrolled it would break apart because it was brittle.

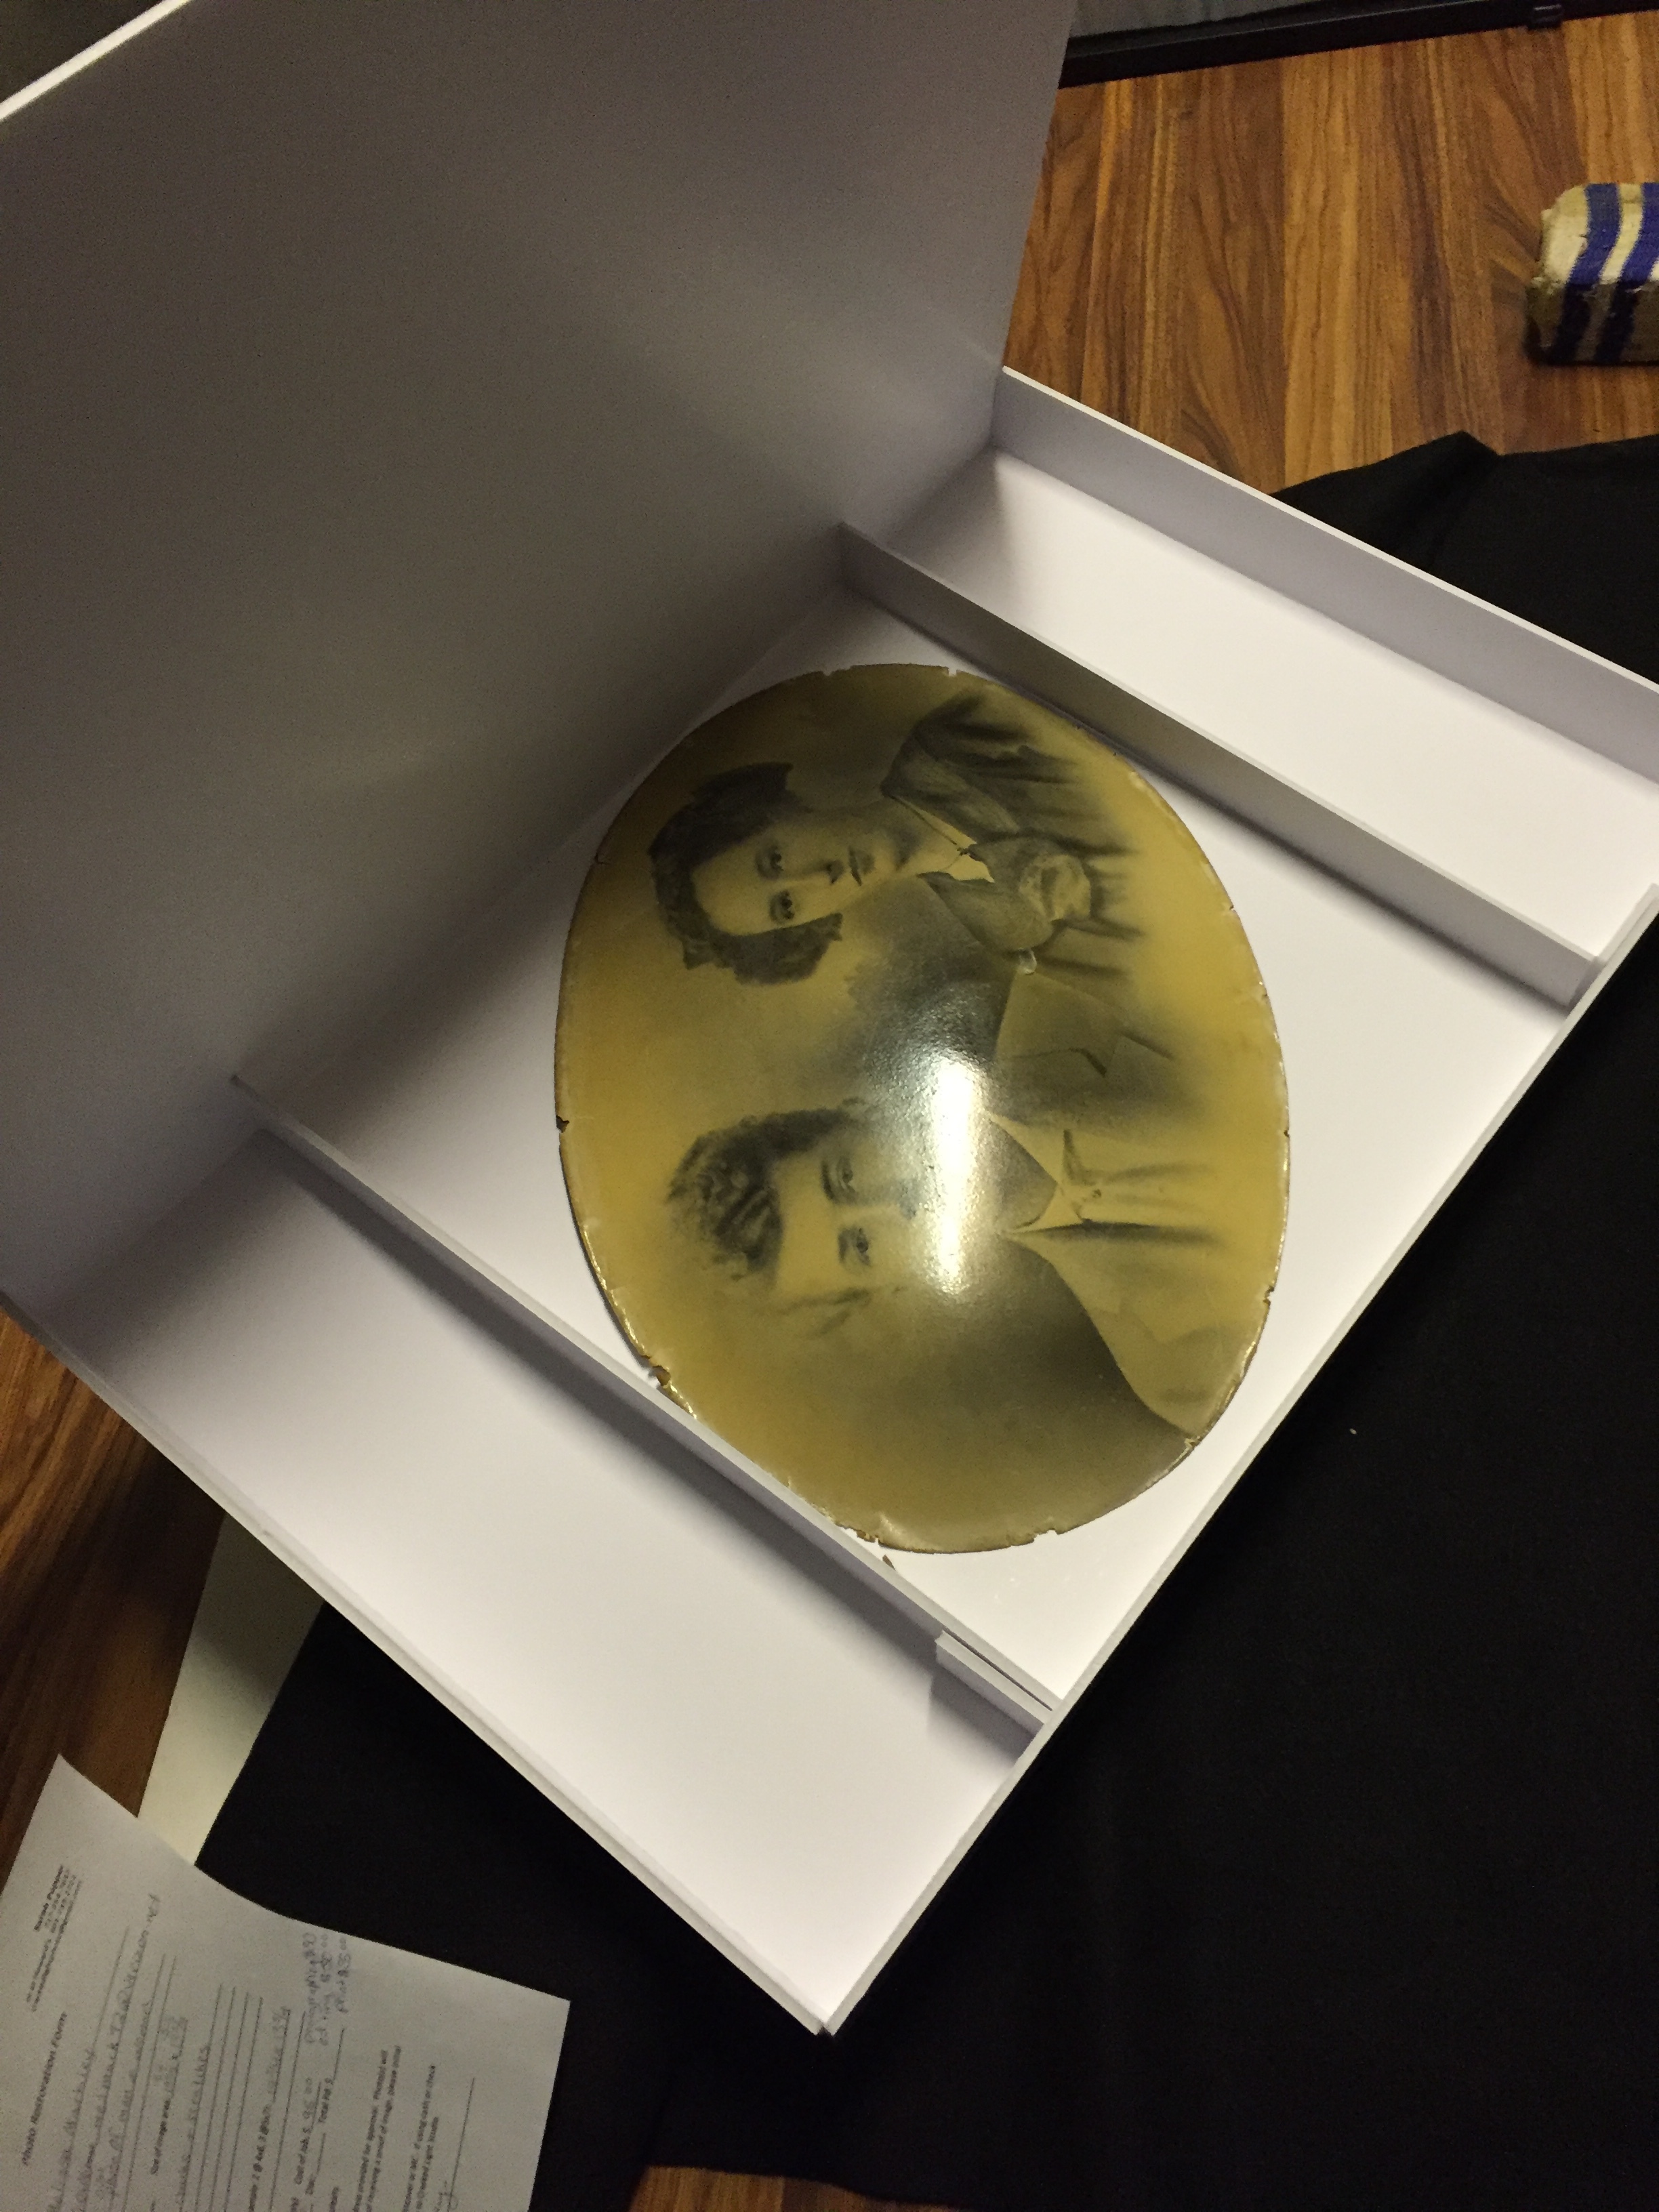
Just a snap shot of a portion of the image. Image was approximately 22” long.
The customer of course wanted me to “fix” it. Well, as I stood there just staring at the image all rolled up, I wondered how I would possibly give the client what they wanted. I think to myself, “As soon as I unroll this it is going to fall apart. How will I scan/photograph this? Will I have to unroll it bit by bit and photograph each section and splice it together? This thing is definitely not going to be able to stay together. How will I hold it in place? Can I even say yes to this project? SHOULD I even say yes to this project?” Well, as I ran through all the questions in my head I heard myself, out loud, saying “I’m sure I can do something.”
So now comes the part where I have to figure out how to do it. I informed the client that the photo may possibly crack apart a little more as I try to flatten it. He understood that it’s the nature of the beast. I decided since the photo was already in several pieces, I would flatten each section under a piece of glass and photograph the picture. I utilized my husband’s hands, foamboard, glass, and some painter’s tape to hold the glass and foamboard as tightly together as possible. After that, I set up all the technical mumbo jumbo (see below, for technical mumbo jumbo), I took many photographs of each section of the picture (you know…just to be on the safe side). I slid the files onto my computer and did what I do best. Where would I even be without Photoshop?
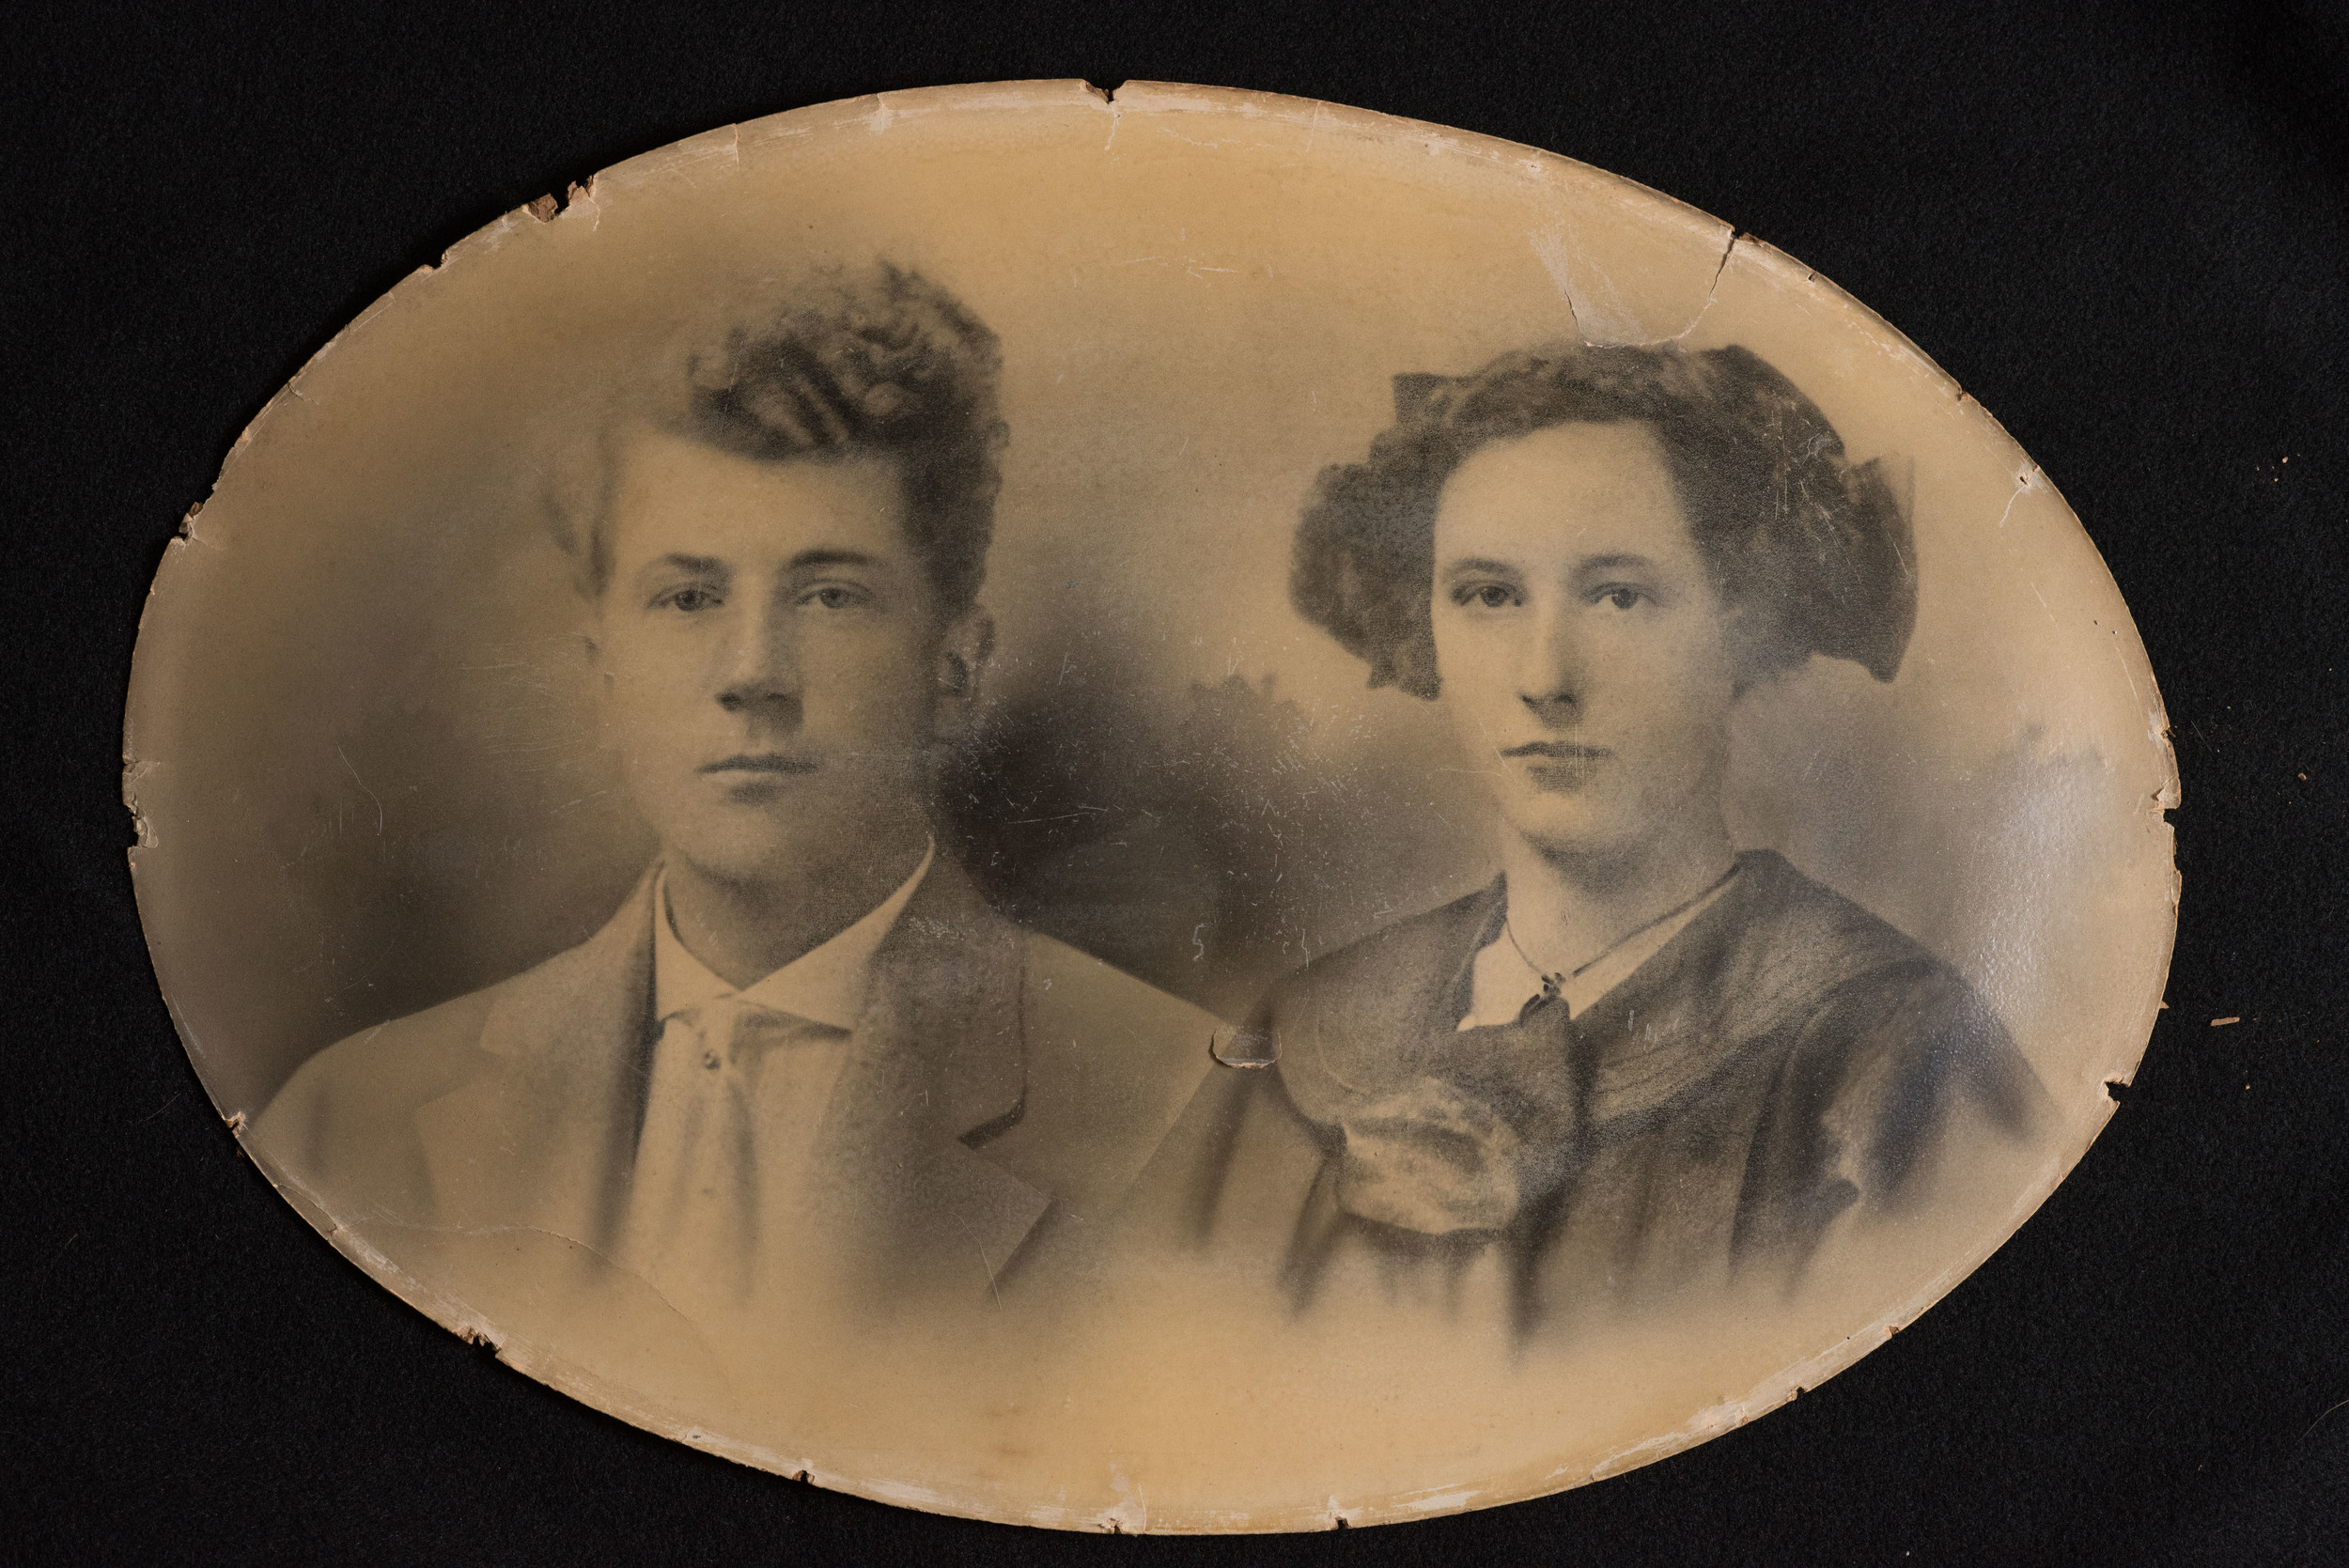
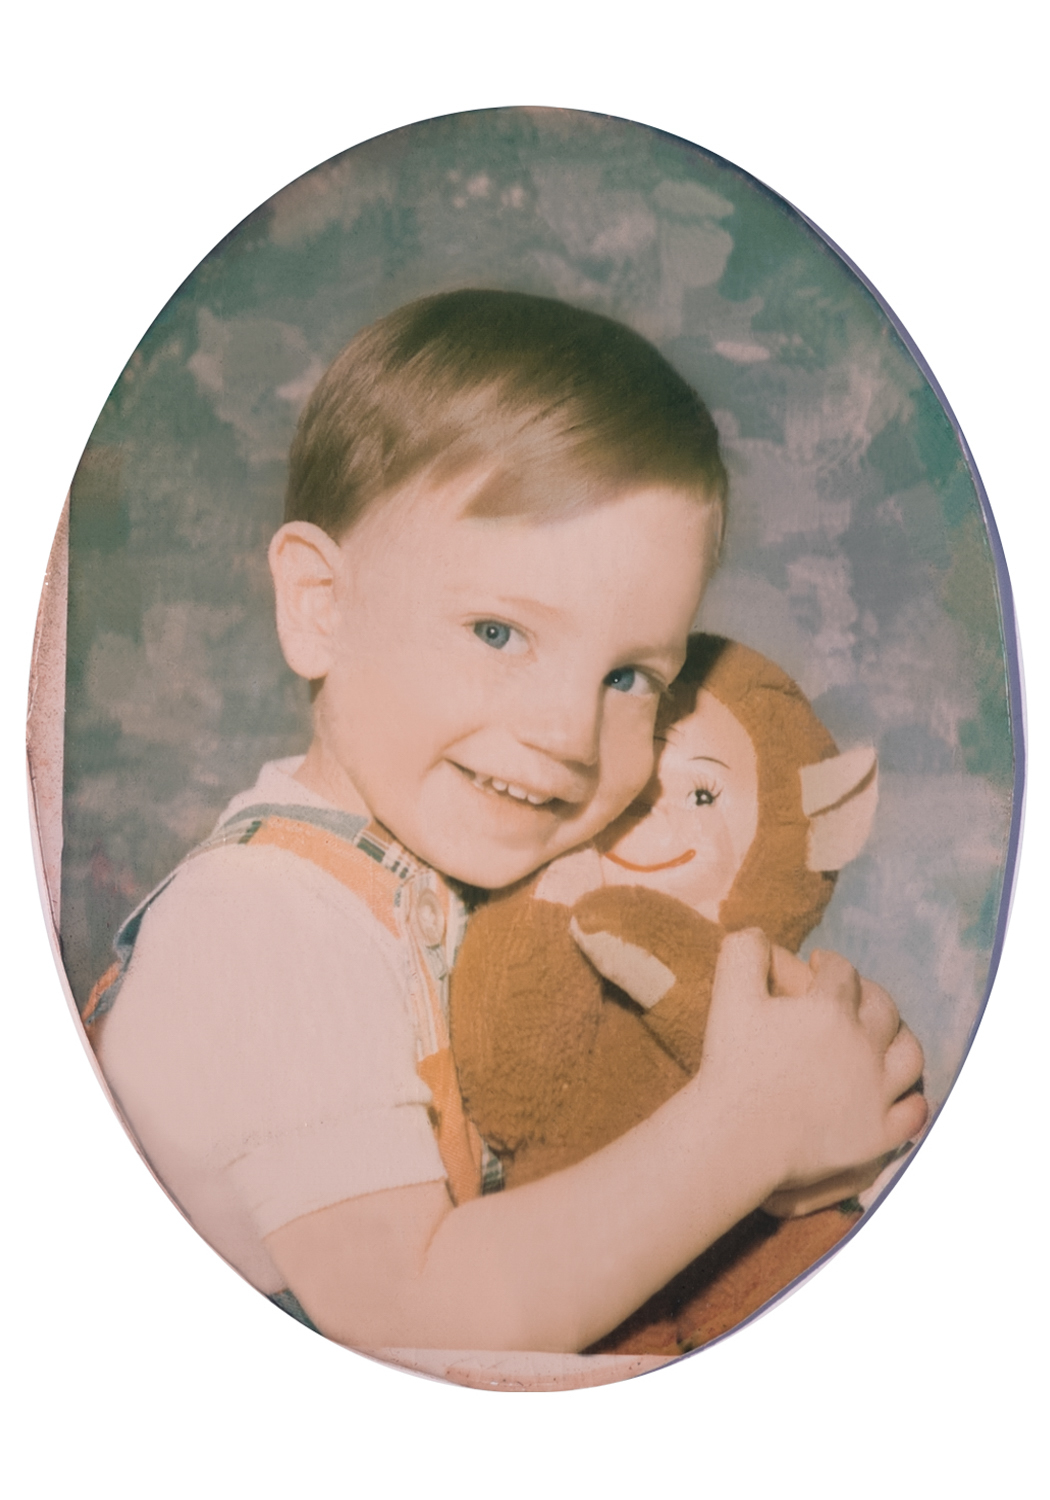
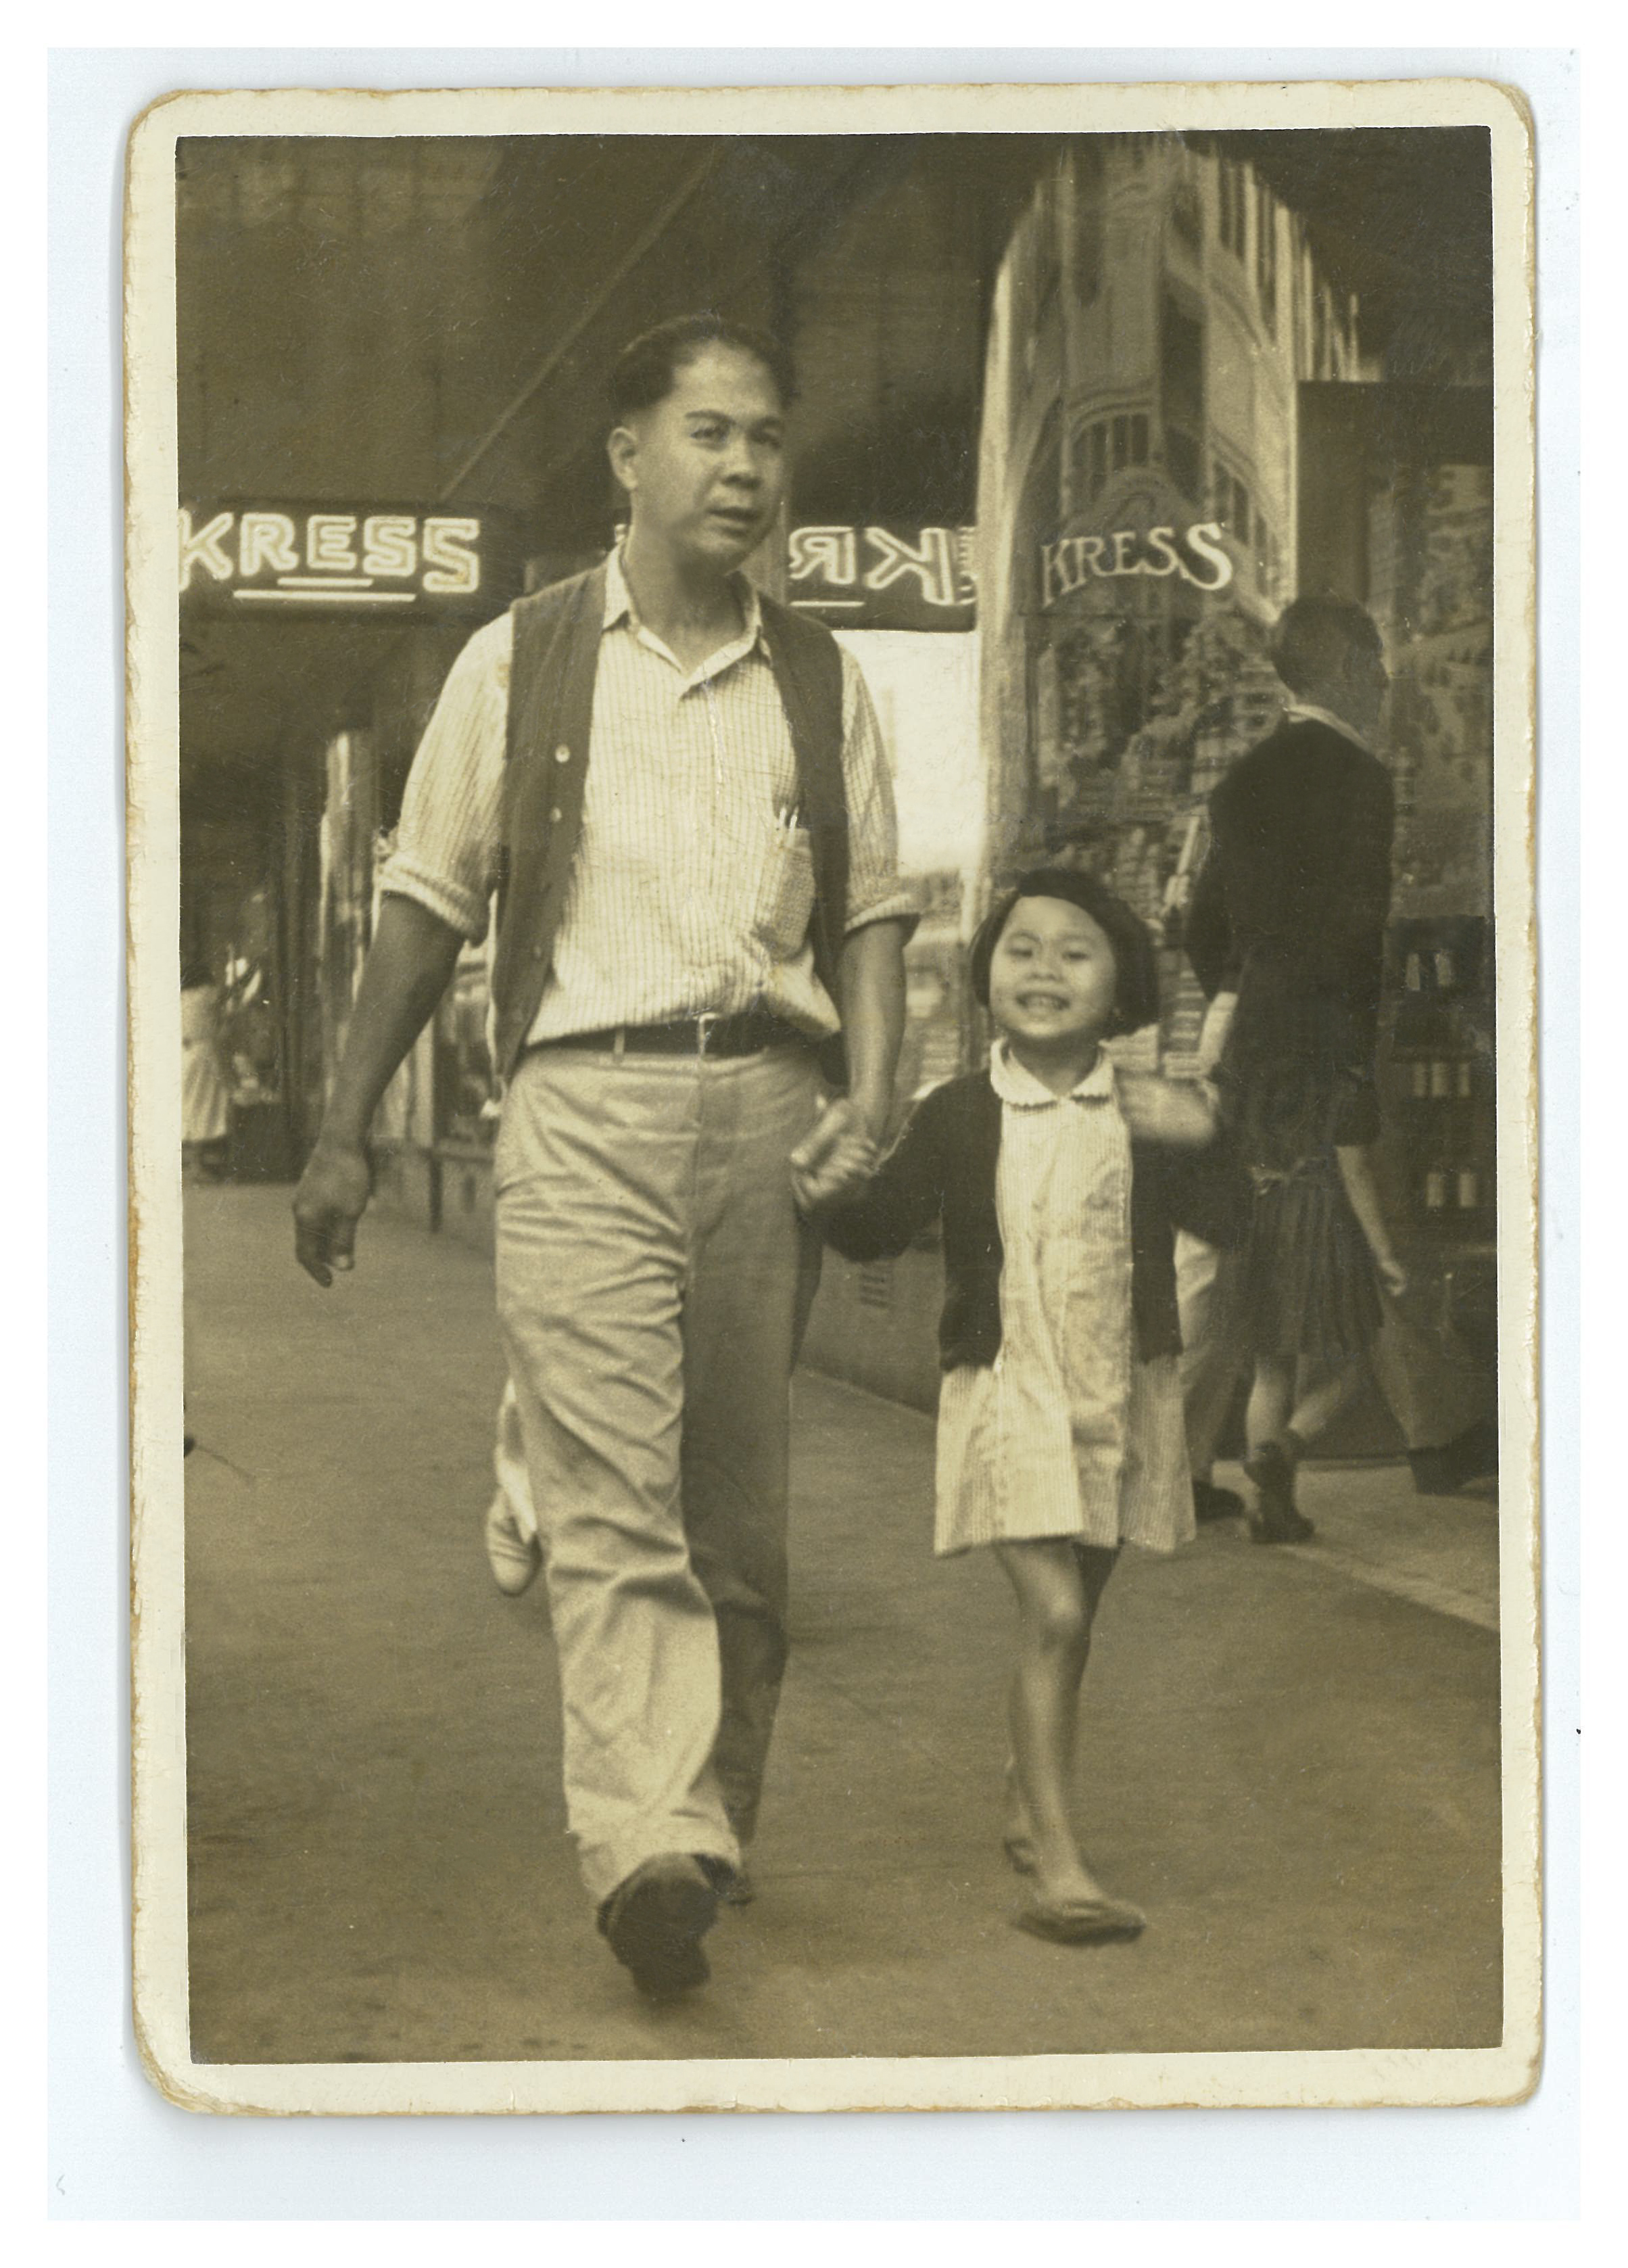
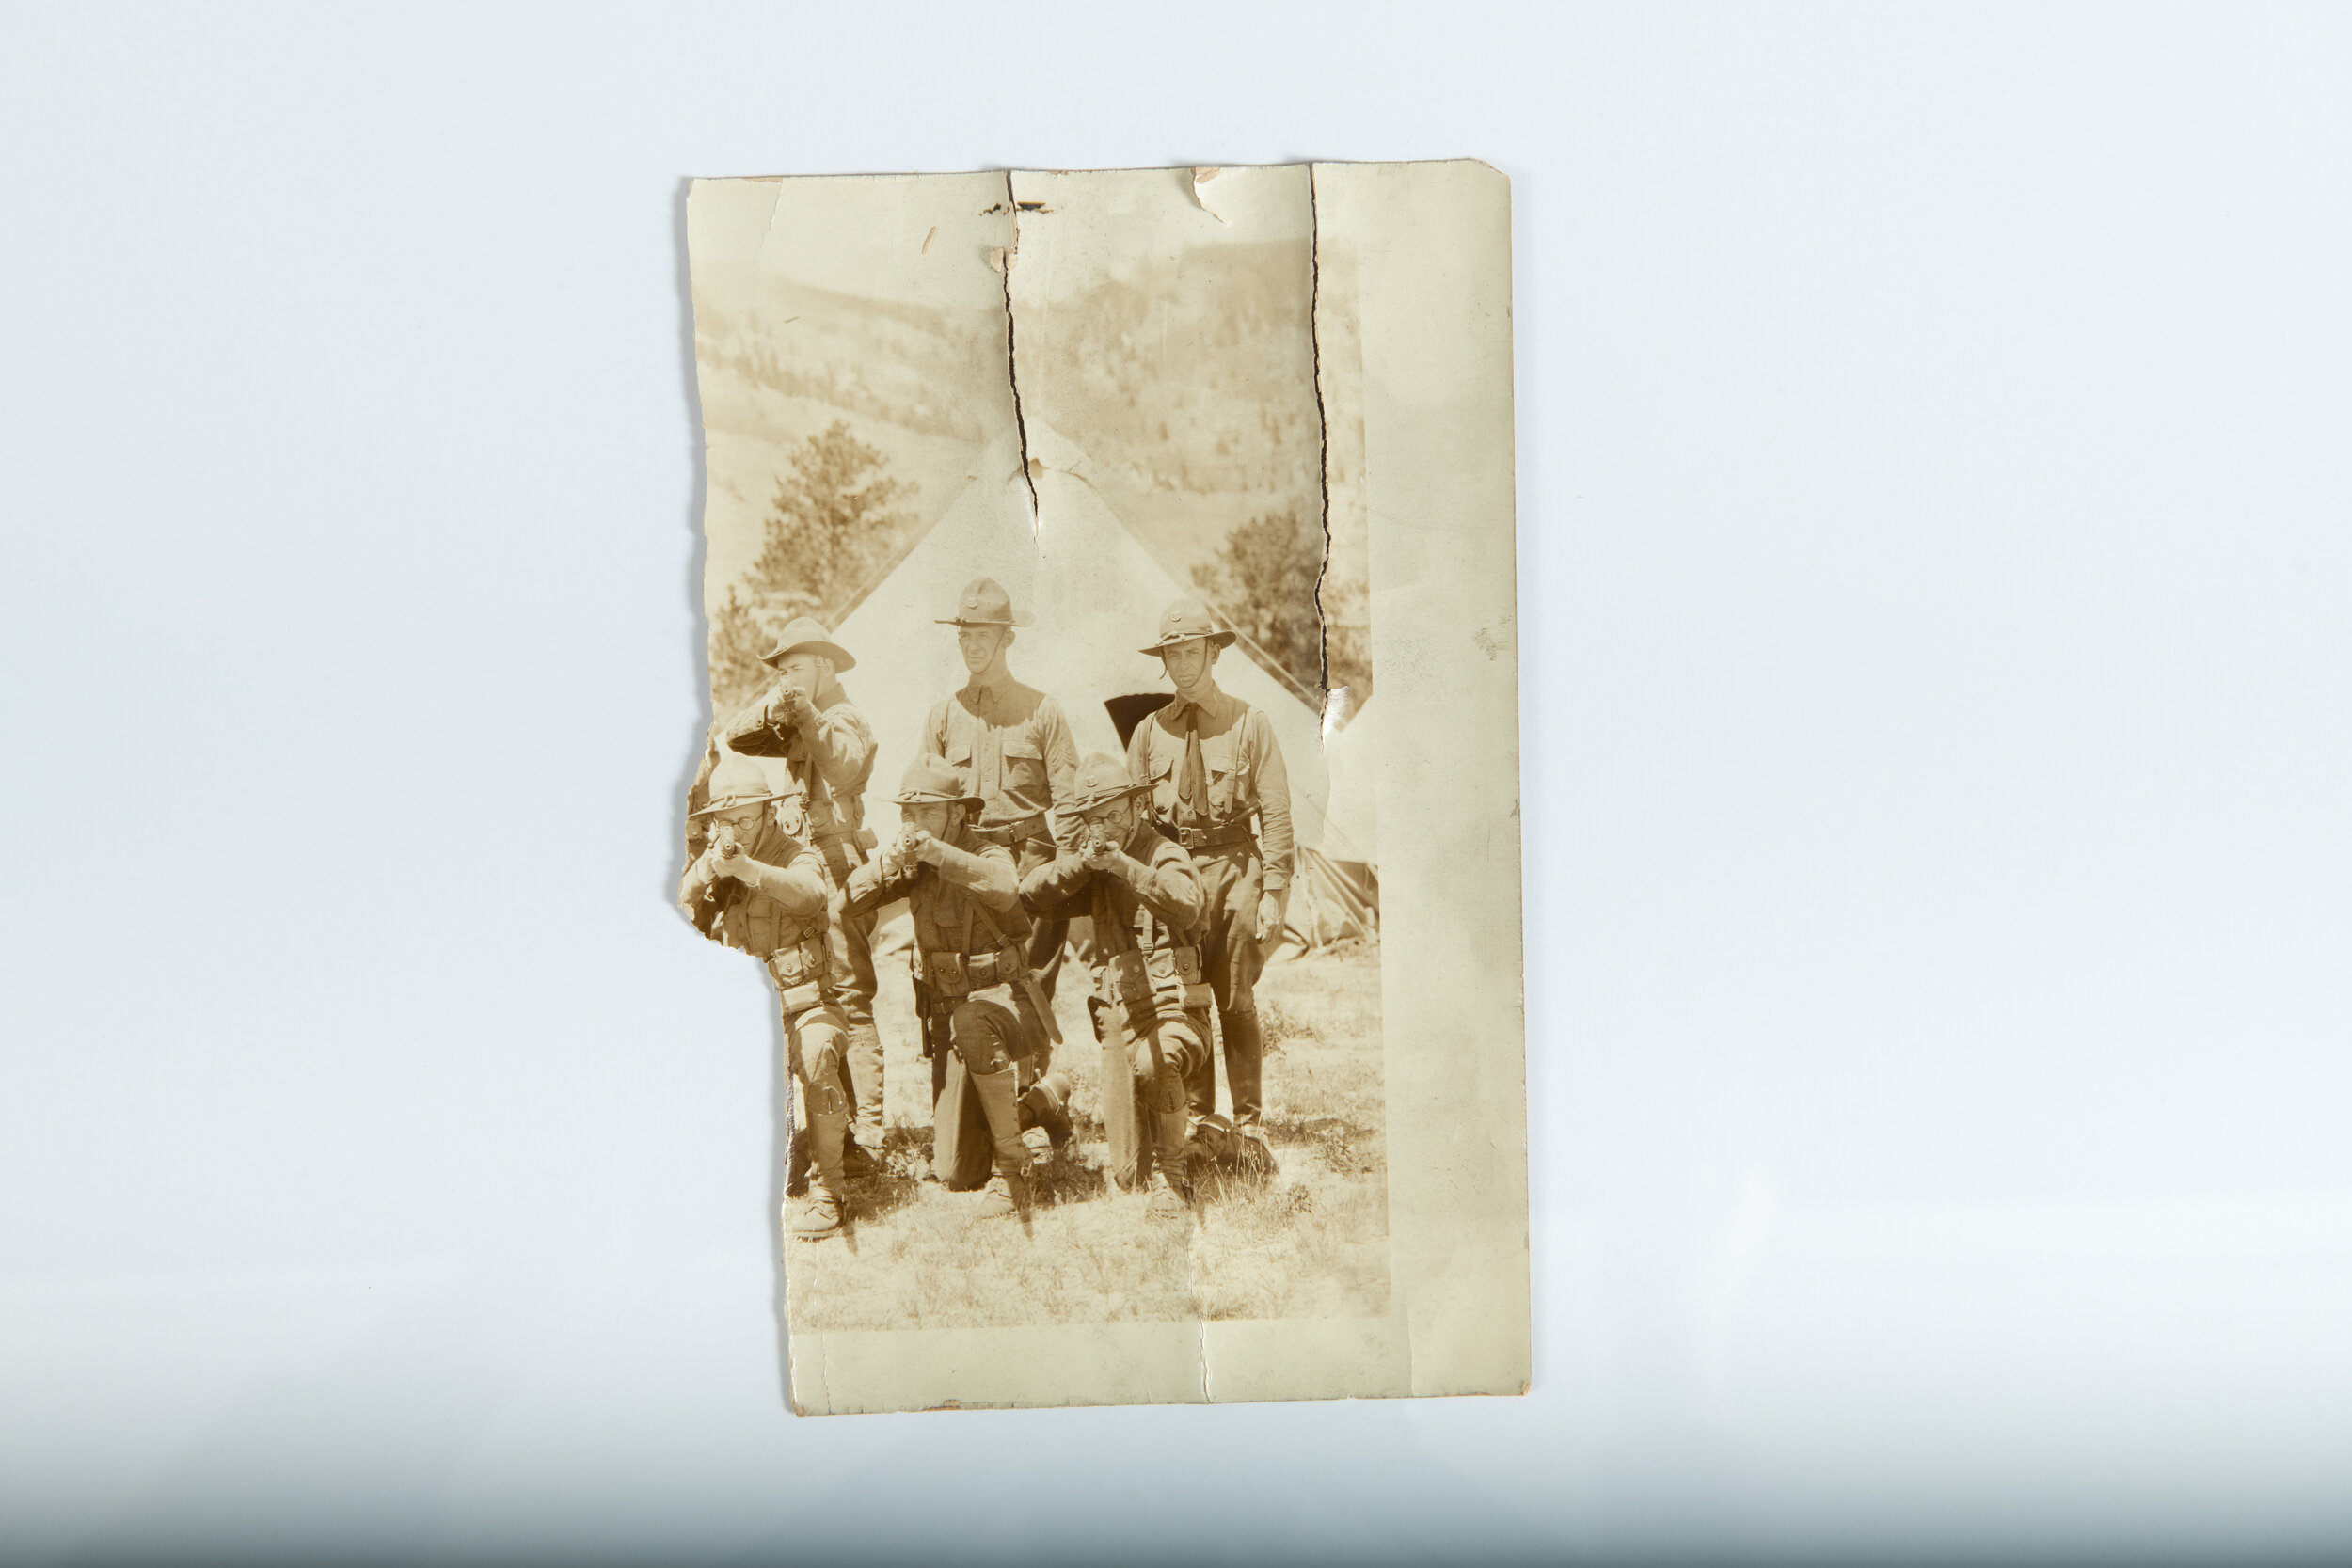
I was excited by the results of this restoration, just because of how challenging it looked upon initial inspection. After hours of sitting in front of my computer screen, zooming in and out, and scrutinizing each section of the image, I became so pleased with the end product. Now the client could keep the original in a safe place, and use the brand new image for display and to pass down to future generations. See the results for yourself!

Technical Mumbo Jumbo:
Step 1: Set camera to highest quality picture setting. I use the Large RAW setting in my Nikon D850, which is a huge file.
Step 2: Set up the lights and camera so that it would create the least amount of reflection on the glass. Set up camera on a tripod so the angle is parallel to the angle of the image. This can be challenging in itself.
Step 3: Use a gray card to set up a custom white balance in the camera. Making it so I have to do minimal color correcting in the computer.
Step 4: Use a light meter to get the perfect light measurement. I always want to be sure I can get as much of the photo in sharp focus as possible, so I always opt for a higher depth of field. I also set to a low ISO so that I get as little “noise” as possible. My settings for these images were: ISO 100, Shutter speed 1/250, F9.0
Step 5: Put camera on a self timer mode so that you don’t get any camera shake when pressing the button (not that you would see it), and more importantly to help with the next step.
Step 6: This is the most frustrating and professional step. Steal husband away from video games and have him help hold a up a bunch of black and/or white foamboards all willy nilly until you can get the lighting and reflections just right on the photograph.
That’s it, that is the extent of my technical expertise. Feel free to message me if you ever have questions or have restoration needs!
TOODLES! -Sarah